Executive Overview
The evolution of 3D computer graphics has fundamentally transformed modern digital media, entertainment, and interactive software development. As pipelines grow increasingly sophisticated, artists and technical directors are continually challenged to bridge the gap between static polygonal geometry and fluid, organic character animation. Following foundational explorations into multi-app 3D workflows, model topology optimization, and mechanical rigging preparation, creators must eventually transition into more advanced technical territories. Among the most vital yet accessible techniques in this transition is the mastery of blend shapes—an indispensable methodology for generating lifelike facial expressions, subtle muscular deformations, and dynamic character reactions.
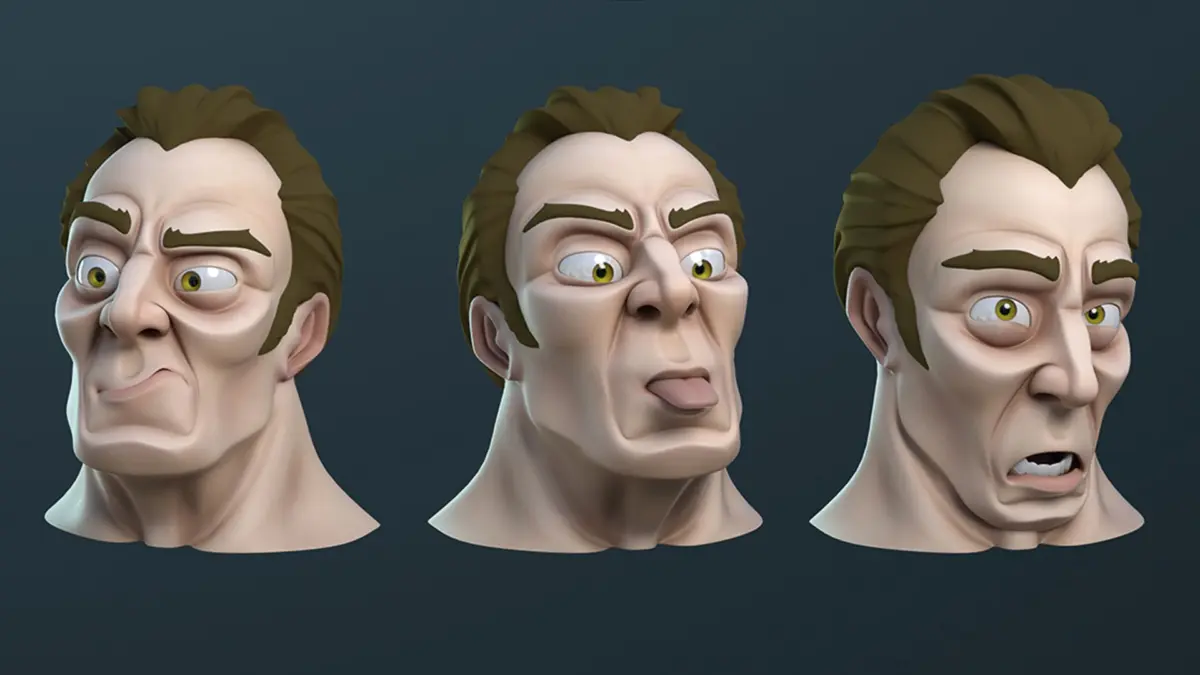
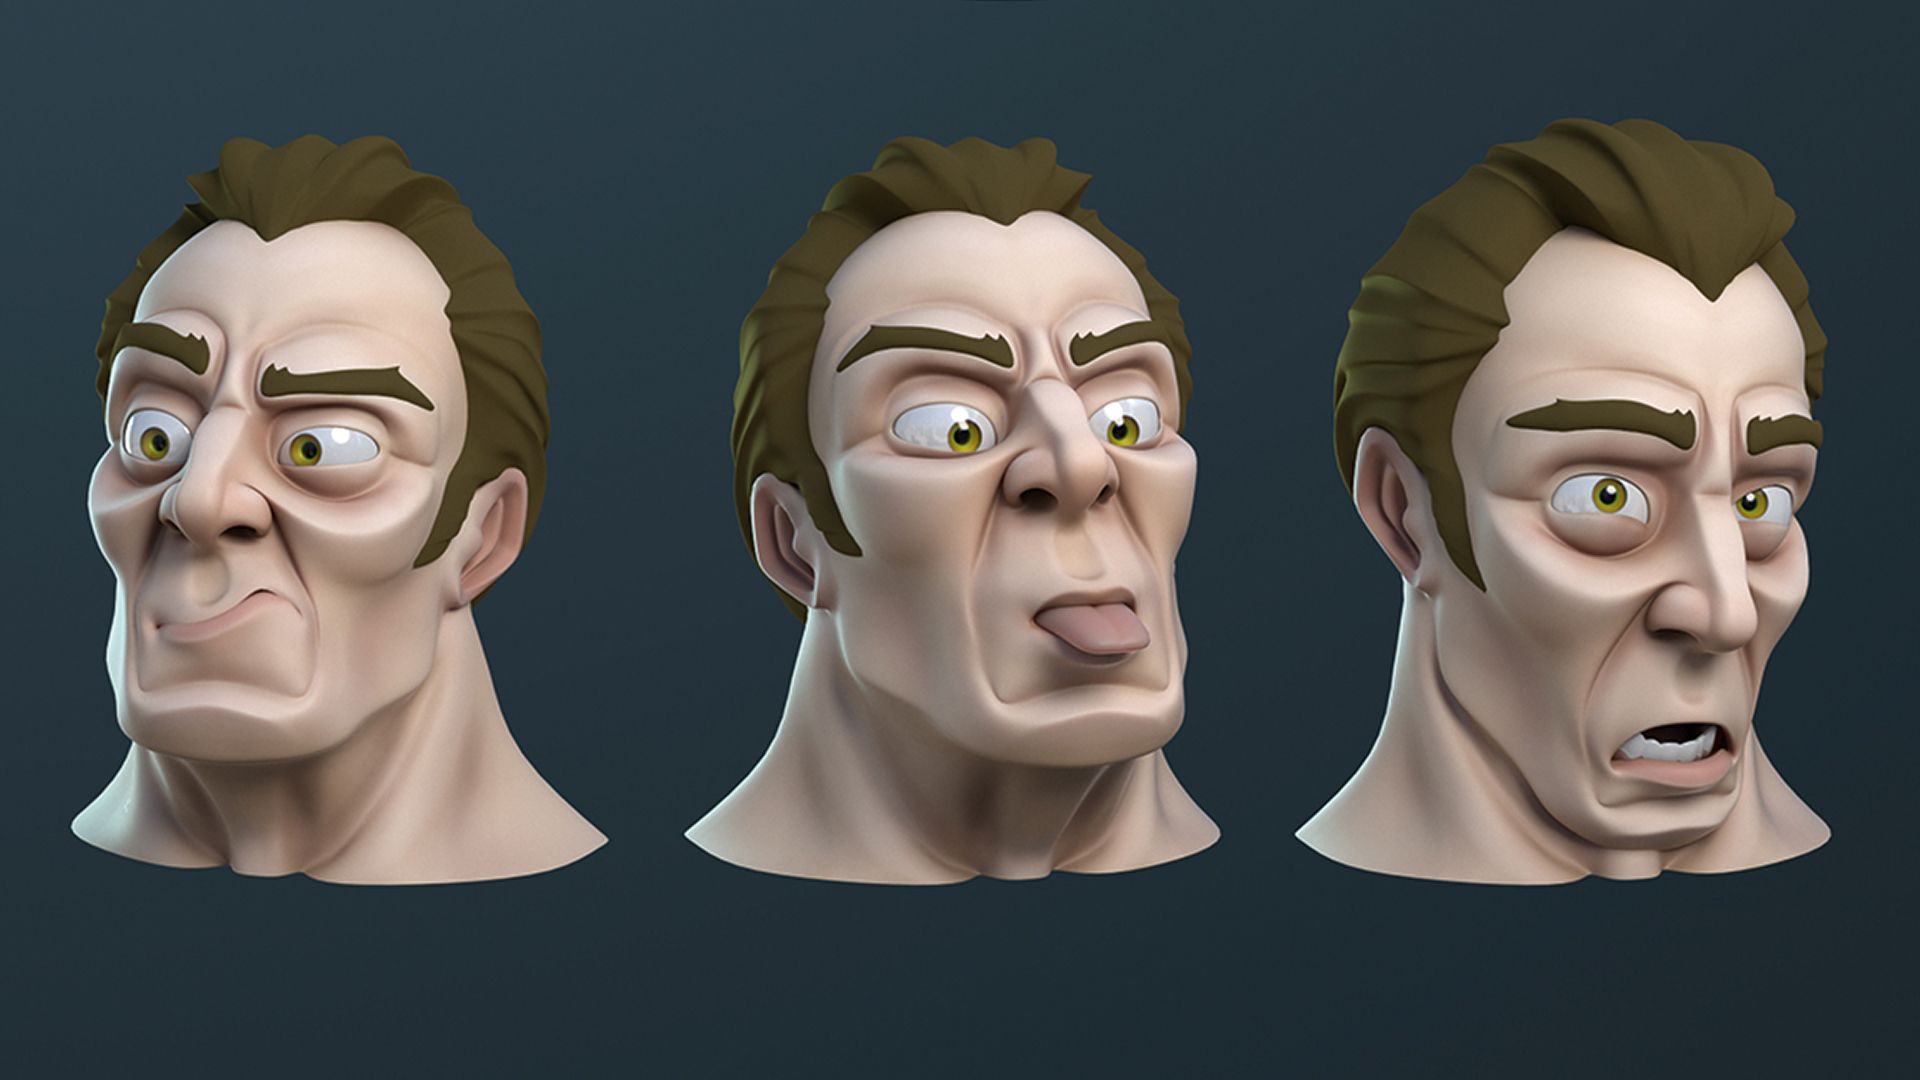
Across the industry, this foundational technique is known by various terms depending on the digital content creation (DCC) suite being utilized: Autodesk Maya designates them as blend shapes, Blender refers to them as shape keys, and Epic Games’ Unreal Engine 5 categorizes them as morph targets. Despite these nomenclature differences, the underlying mathematical and geometric principles remain consistent. Blend shapes allow a 3D model’s vertices to travel linearly from a neutral baseline pose to a targeted expression or configuration over time.
While wonderfully efficient for setting up expressive performances with organic aesthetic results, blend shapes carry distinct geometric limitations. Because individual vertices interpolate along a direct, linear vector from Point A to Point B, they are fundamentally unsuited for anatomical movements that require rotational arcs, such as an eyelid blinking smoothly over the curvature of an eyeball. Nonetheless, when implemented correctly within a robust character pipeline, blend shapes provide an unmatched balance of rapid setup times and high-fidelity emotional delivery. This comprehensive guide explores the mechanics of blend shapes, details a step-by-step masterclass for their implementation, and analyzes their broader implications for the future of real-time and offline 3D character animation.
Detailed Chronology: The Evolution and Mechanics of Morphing Technology
To truly appreciate the utility of modern blend shapes, one must examine how character deformation has evolved alongside computational hardware capabilities. In the early days of computer-generated imagery (CGI), animators relied almost exclusively on rigid skeletal hierarchies and heavy joint-based weighting to deform organic surfaces. While effective for limbs, torsos, and gross body movements, skeletal rigs often proved cumbersome, imprecise, and unnatural when applied to the hyper-complex musculature and skin sliding of the human face.
The Shift Toward Vertex-Level Deformation
During the late 1980s and 1990s, computer graphics researchers sought alternative methods to replicate subtle facial changes—such as smiles, frowns, speech phonemes, and winks. This led to the development of vertex animation techniques, where artists could manually displace individual points on a mesh to capture specific expressions.
- The Static Morph Era: Early proprietary software allowed artists to swap out entire geometric meshes frame-by-frame or interpolate between two distinct models. However, this approach lacked granular control and often created severe volume loss and tearing during transitions.
- The Introduction of Linear Interpolation: Software engineers soon refined the mathematics behind vertex interpolation. By calculating the mathematical difference between the coordinates of a base mesh ($Vbase$) and a target mesh ($Vtarget$), algorithms could dynamically shift vertices along a linear path governed by a scalar weight value ($t$ ranging from $0.0$ to $1.0$).
- Real-Time Integration: As graphics processing units (GPUs) advanced into the 21st century, the computational load of processing blend shapes shifted from central processors to hardware accelerators. Game engines like Unreal Engine and Unity began supporting hardware-accelerated morph targets, enabling real-time cinematic rendering and responsive player-character facial animations without impacting frame rates.
The Mathematics of Linear Interpolation (Lerp)
At the heart of every blend shape operation is standard linear interpolation. Mathematically, the position of any given vertex ($V_final$) during a blend shape animation is defined by the equation:
$$Vfinal = Vbase + w cdot (Vtarget – Vbase)$$
Where $w$ represents the weight slider value set by the animator. When $w = 0$, the model remains in its neutral base posture. When $w = 1$, the vertex has completely transformed into the position dictated by the target shape. When $w$ sits at intermediate values (e.g., $0.5$), the vertex rests precisely halfway along the direct vector connecting its starting point to its destination.
This direct trajectory, while computationally lightweight and predictable, explains why blend shapes struggle with curved trajectories. Because every vertex travels in a straight line, intermediate frames of a complex rotational movement can sometimes exhibit undesirable volume shrinkage or "collapsing" if the distance between Point A and Point B cuts inward across the volume of the model.
Supporting Context & Industry Metrics: Hardware, Workflows, and Production Standards
Implementing efficient blend shape workflows requires a harmonious relationship between artistic vision, software proficiency, and high-performance hardware architecture. As polygon counts in cinematic models and game assets soar into the hundreds of thousands, the infrastructure supporting 3D artists must keep pace.
Hardware Requirements for High-Density Morph Workflows
When working with complex facial rigs containing dozens—or sometimes hundreds—of individual blend shape targets (such as those mapped to the Apple ARKit standard for motion capture retargeting, which utilizes 52 distinct blend shapes), computer hardware experiences unique performance demands:
- Central Processing Unit (CPU): Calculating vertex offsets across high-resolution geometry places a heavy burden on single-core and multi-core CPU processing speeds, particularly during the shape-sculpting and weight-painting phases in software like Blender and Maya. Processors with high clock speeds and robust cache sizes are essential.
- Random Access Memory (RAM): Duplicating a high-poly base model multiple times to create individual morph targets consumes vast amounts of system memory. For modern production pipelines working with 4K asset resolutions and dense topology, 32GB of RAM is considered the absolute baseline, with 64GB or 128GB recommended for enterprise studio environments.
- Graphics Processing Unit (GPU): In real-time engines and modern viewport renderers (such as Unreal Engine 5’s Nanite-enabled environments or Blender’s Cycles and Eevee), VRAM capacity directly dictates how many morph targets can be evaluated simultaneously on screen. A dedicated GPU with at least 12GB to 16GB of VRAM ensures smooth playback and responsive viewport feedback.
For artists seeking dedicated mobile workstations or studio hardware upgrades, investing in specialized mobile powerhouses—as highlighted in dedicated guides for the best laptops for animation and precision input devices like the best drawing tablets—can dramatically accelerate productivity.
Comparative Software Analysis for Blend Shapes
| Software Platform | Native Terminology | Primary Strengths | Ideal Use Case |
|---|---|---|---|
| Autodesk Maya | Blend Shapes | Robust node-based architecture, excellent slider management, industry standard for VFX. | Feature film pipelines, high-end broadcast television, complex rigging networks. |
| Blender | Shape Keys | Highly accessible, non-destructive modifier stack, integrated sculpting toolset. | Independent game development, indie animation shorts, budget-conscious pipelines. |
| Unreal Engine 5 | Morph Targets | Real-time GPU acceleration, direct integration with Animation Blueprints and MetaHumans. | Real-time interactive applications, virtual production, AAA video game development. |
Step-by-Step Masterclass: Creating Animation Blend Shapes
To demystify the technical implementation of morph targets, let us break down the creation process into three distinct, actionable phases. Whether you are using Maya, Blender, or another professional DCC application, these foundational principles remain universally applicable.
01. Create Your Morph Targets
The journey toward a fully expressive character begins with asset duplication. You cannot build a blend shape without a clear reference point derived from your foundational topology.
- Duplicate the Base Mesh: Select your primary character model in its neutral, resting pose (often referred to as the bind pose or T/A-pose). Duplicate this mesh once for every distinct facial expression or deformation you intend to create. For a basic setup, you might create targets for a smile, a frown, jaw-open, and blink states.
- Spatial Organization: Once duplicated, systematically move these new models away from the center of your scene coordinate grid. Placing them in a clean, orderly row or grid surrounding your main character ensures you can easily inspect them individually without visual clutter or accidental mesh selection errors.
- Naming Conventions: Adopt a strict naming convention immediately (e.g.,
Character_Base,Target_Smile,Target_Frown,Target_Blink_L). Disorganized asset nomenclature is one of the leading causes of pipeline friction in collaborative studio environments.
02. Generate the Shapes
With your targets isolated and clearly labeled, you can begin sculpting the required anatomical deformations.
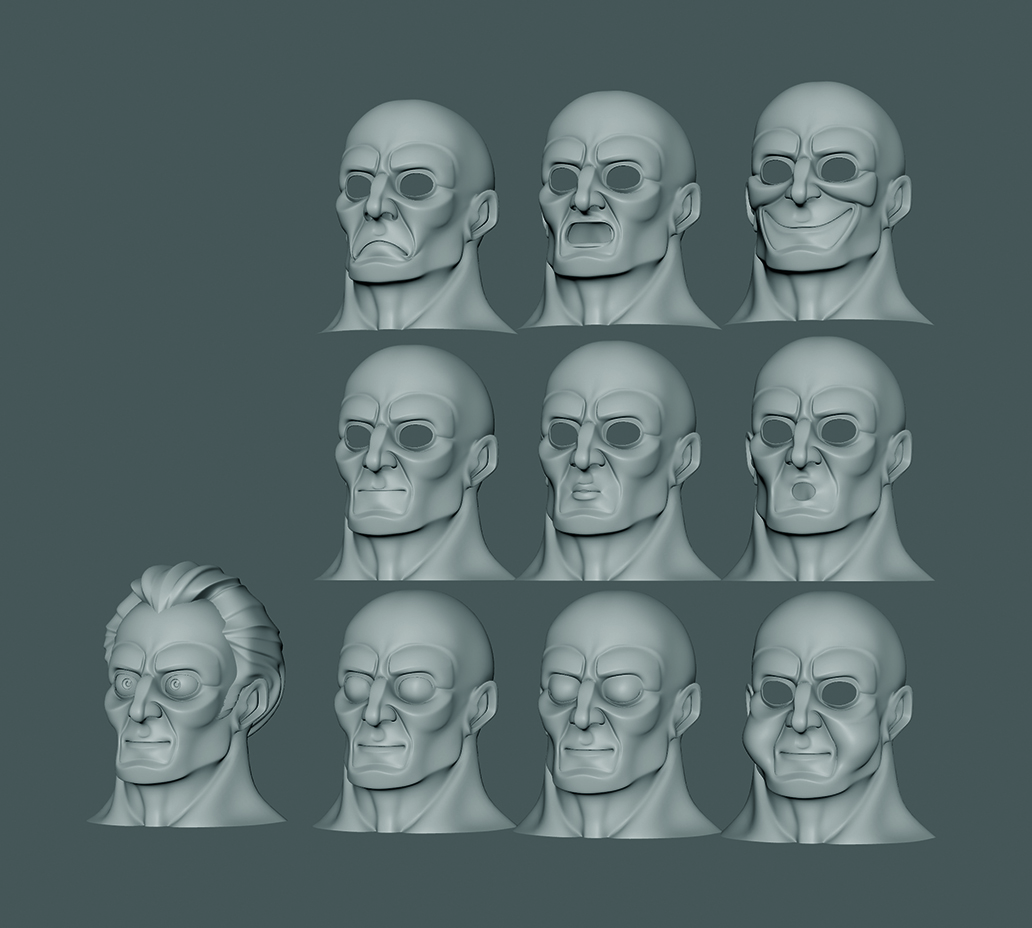
- Sculpting vs. Vertex Editing: While you can technically select individual vertices or vertex loops and manually translate them using transformation gizmos, this manual method is painstakingly slow and rarely yields organic results. Instead, leverage your software’s dedicated sculpting toolsets (such as grab, smooth, inflate, and push brushes) to manipulate the mesh surface fluidly.
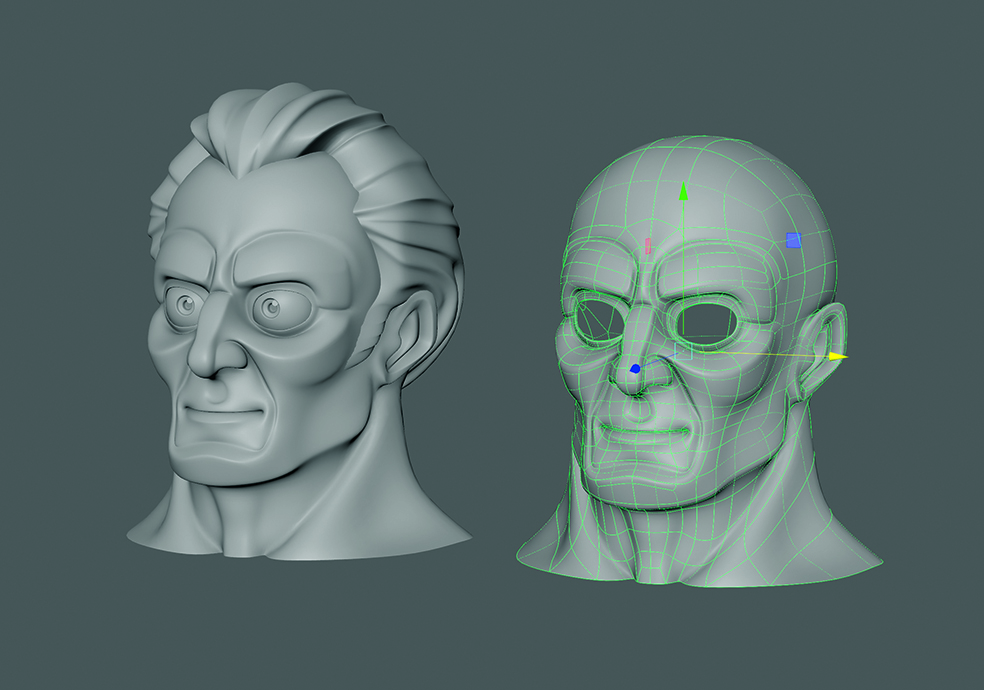
- Preserving Topology and Edge Flow: Ensure that you never add, delete, or reorder vertices on your morph targets. Every single vertex on a target mesh must correspond topologically to its exact counterpart on the base model. If the vertex count or point order differs even slightly, the software will reject the connection or produce chaotic, explosive geometry distortion when the blend is applied.
- Anatomical Accuracy: Pay close attention to natural muscle movement. When sculpting a smile, for instance, remember that the corners of the mouth pull upward and back, causing the cheeks to bunch slightly and the lower eyelids to rise. Incorporating these secondary micro-movements elevates the realism of the final animation.
03. Connect Using a Blend Shape Node
The final phase bridges your sculpted targets back to your primary character model, establishing the control mechanisms required for animation playback.
- Establishing the Connection: Select your target meshes in a specific order (usually selecting all desired morph targets first, followed by the base mesh as the final active selection) and execute your software’s "Create Blend Shape" or "Join as Shape Keys" command.
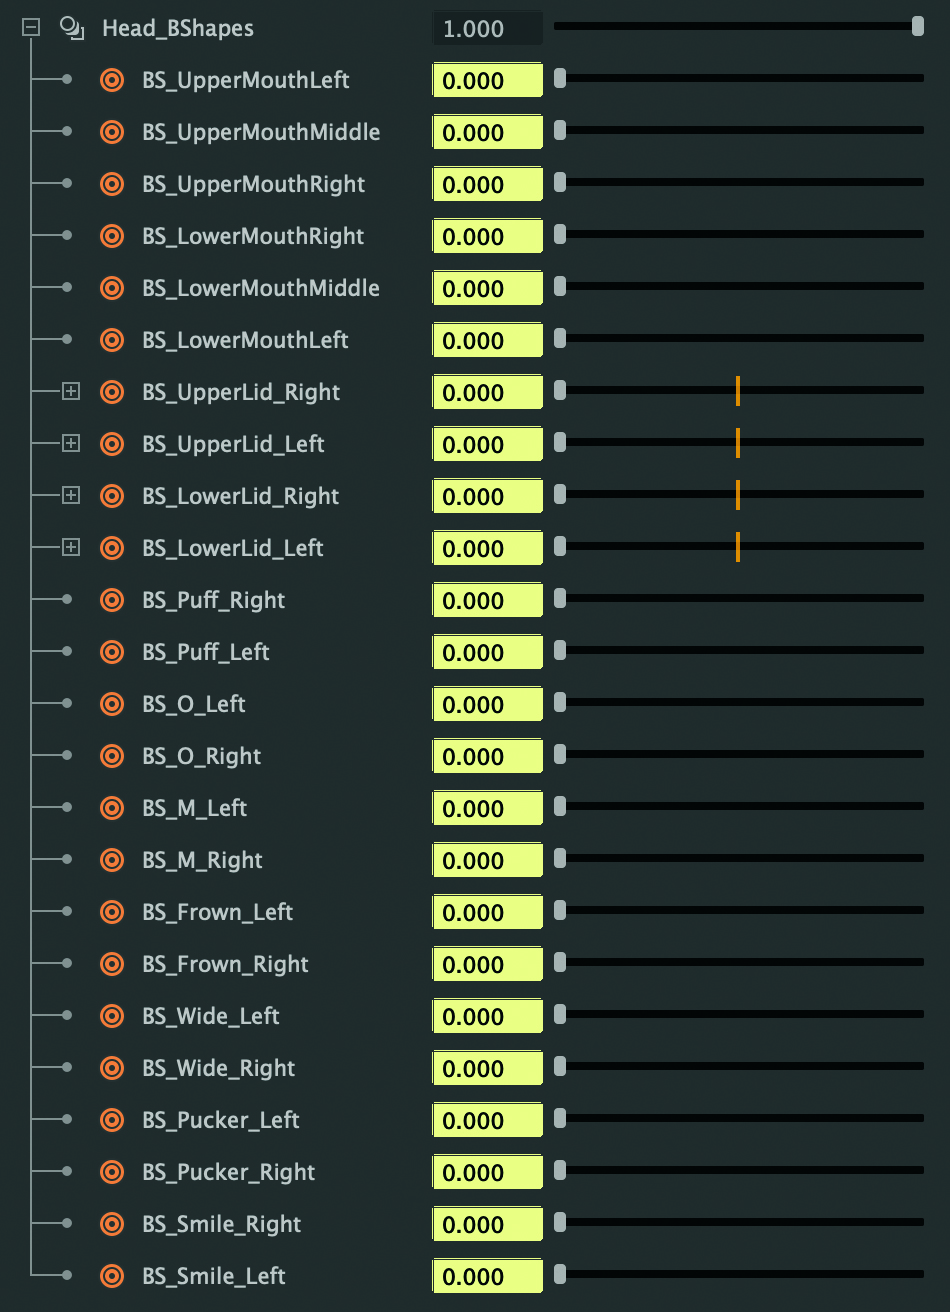
- The Blend Shape Node / Interface: Once connected, the software generates a dedicated blend shape node attached to the base model. Open your application’s blend shape editor or channel box to view a vertical list of sliders corresponding to each morph target you created.
- Animating the Sliders: Bring your character to life by keyframing these slider values over time on your timeline. By blending multiple sliders simultaneously (such as combining a partial smile with widened eyes), you can generate a vast matrix of complex, nuanced emotional expressions from a relatively small pool of foundational sculpts.
Official Statements and Expert Perspectives
Industry veterans and technical directors frequently emphasize the importance of hybrid rigging systems—reminding artists that blend shapes should complement, rather than completely replace, skeletal deformation.
"Blend shapes are the bedrock of believable character facial animation. They give artists direct, tactile control over silhouette and form in a way that pure joints simply cannot replicate. However, the secret to modern high-end production isn’t relying on blend shapes alone—it is building a symbiotic ecosystem where corrective morph targets clean up the unwanted artifacts and deformations of underlying skeletal joints."
— Antony Ward, Senior 3D Artist and Technical Instructor (via ImagineFX)
Furthermore, technical pipeline engineers note that while real-time engines have made incredible strides in handling thousands of blend shapes concurrently (thanks to GPU compute shaders and optimized data compression), excessive morph target usage can still introduce memory bandwidth bottlenecks in mobile and web-based 3D applications. Optimization remains a crucial discipline for digital artists.
Future Outlook: The Next Generation of 3D Character Deformation
As the digital arts landscape marches forward, the methodologies governing blend shapes and character deformation are undergoing revolutionary advancements driven by artificial intelligence and machine learning.
- AI-Driven Facial Rigging: Emerging machine learning tools are beginning to automate the generation of blend shape targets from simple 2D video scans or voice audio inputs. Platforms can now analyze an actor’s performance and automatically drive complex sets of morph targets in real-time, drastically reducing the labor-intensive sculpting phase.
- Neural Blend Shapes: Traditional linear interpolation is increasingly being augmented by neural network-based deformation layers. These advanced systems predict non-linear volume preservation, eliminating the traditional collapsing artifacts associated with direct vector movement and allowing vertices to track natural anatomical arcs.
- Cross-Platform Standardization: Efforts toward universal asset description formats—such as Pixar’s Universal Scene Description (USD)—are streamlining how blend shapes and shape keys are transferred between modeling packages (like Blender and Maya) and real-time engines (like Unreal Engine and Unity), ensuring seamless pipeline integration across global production teams.
By mastering the fundamentals of blend shapes today, 3D artists position themselves at the cutting edge of character animation technology. Whether you are crafting indie video game protagonists, architectural visualizations, or cinematic blockbusters, understanding how to manipulate vertices through morph targets is an essential milestone on your journey toward complete technical and artistic mastery in the third dimension.